
Last Updated on
This article contains affiliate links. If you choose to make a purchase through a link in this article I will earn a commission at no extra cost to you.
You’ve just started your blog. You have amazing content and you know deep down someone out there will benefit from reading your posts or being introduced to your products/service.
There’s only one problem…
Every time you check your Google Analytics it’s crickets.
The traffic is barely tricking in and you’re beginning to wonder if you’re even cut out for having an online biz. Sound familiar?
You’re not alone! Many bloggers and online creators struggle to drive traffic back to their sites, and in turn, struggle to grow an email list, make sales and thrive online.
But there’s a simple way to drive traffic to your site: Pinterest marketing.
Having a Pinterest marketing strategy wasn’t something I initially thought of when I first started my blog several years ago.
Like many, I thought Pinterest was for DIYs, planning a wedding or finding new recipes.
But after hearing countless bloggers claim Pinterest to be the number one source of traffic, I knew I needed to try it out myself.
My Pinterest Marketing Results
Before I dive into the steps you can take to set up your Pinterest marketing strategy, I’d like to quickly share my results with you.
I noticed major improvements a few months after incorporating Pinterest to my marketing strategy.
First, my Pinterest monthly views increased from only a couple of thousand a month to over 300,000 a month — but views don’t mean anything if I’m not actually getting clicks. So how was my traffic affected?
As you can see from the chart below, clicks to my website were zero prior to April (when I didn’t have a Pinterest strategy up and running) and shortly after began to grow exponentially:
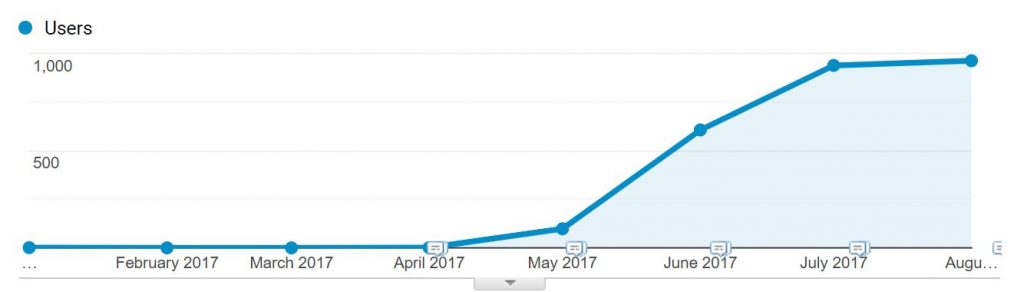
Above is an 800% increase in traffic simply from following the steps I’m going to outline for you in today’s article.
Oh, and I should mention, you don’t need to have a huge following on Pinterest to get started (I had no followers when I first began pinning my content)!
And the best part? I spend probably 20-30 minutes per week working on my Pinterest marketing strategy.
Related articles:
- Pinterest Mistakes You Are Making: Don’t make these same mistakes that I did.
- How to Make Money With Affiliate Links on Pinterest: Pinterest can actually make you money and I’m telling you exactly how you can use Pinterest to easily earn money with your affiliate links.
- Free Media Kit Template: Grab my free media kit template that you can edit right in MS Word!
- How to Look Like a Pro Blogger (Even When You Aren’t Just Yet): The title says it all! My secrets for faking it ’til you make it!
So let’s go through the exact steps I took in order to optimize my Pinterest account and let it grow on autopilot so you too can start getting traffic from Pinterest!
Step 1: Sign Up For A Business Account
First things first, sign yourself up for a business account on Pinterest so you are able to view your analytics and keep track of your progress.
Sign up for a business account here.
Once you’ve signed up for your Pinterest account, you will want to go into your profile and into the edit settings:
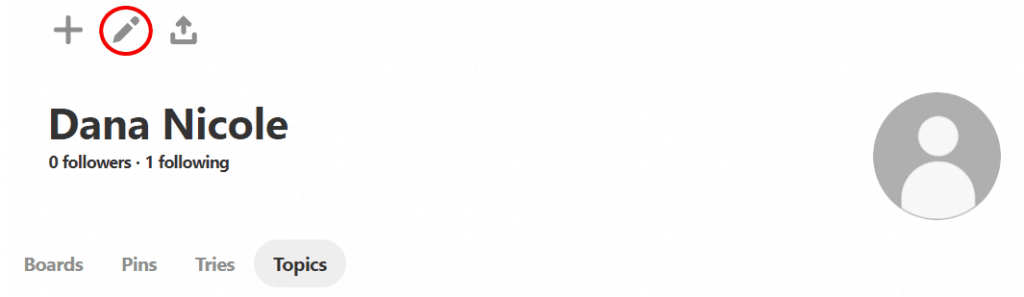
Now claim your website by clicking the “Claim Website” along the left-hand side of your profile settings.
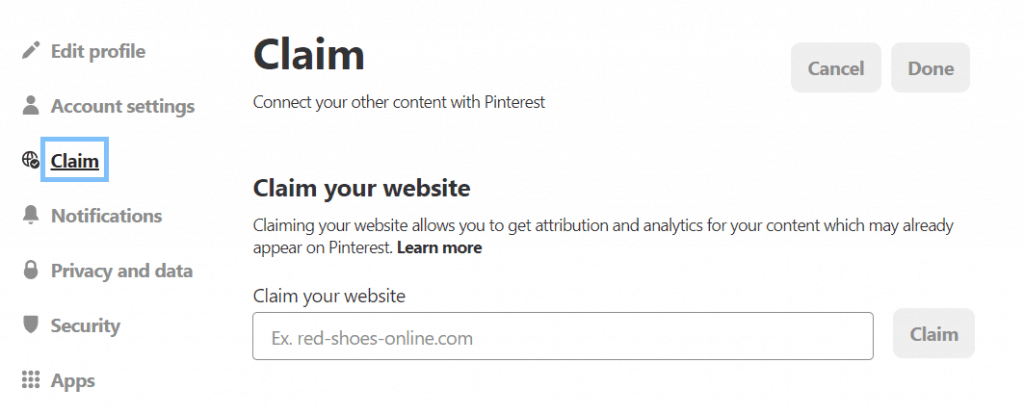
Next, you’ll need to verify your website.
If you are a WordPress user, you can easily do this by installing the free version of the Yoast plugin. Once Yoast is installed, click “SEO” in your WordPress dashboard, and click head to “Social”.
Once in this area, click the tab that says “Pinterest”. Go back to your Pinterest account settings and enter your URL where is says “Website” and click “confirm”.
You will then be given a meta tag to copy and page over from Pinterest into Yoast:
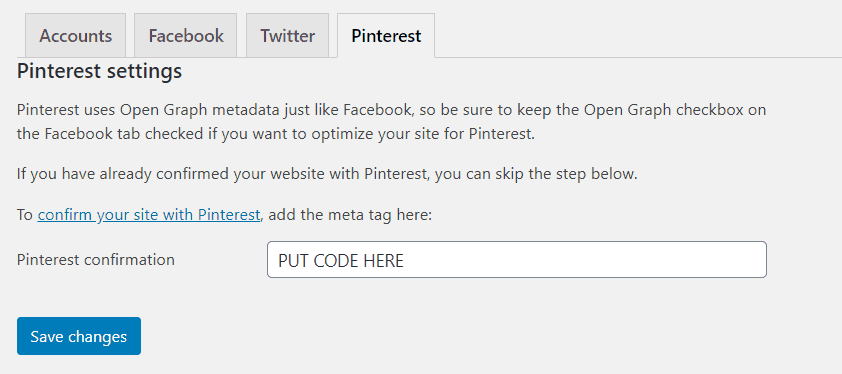
Copy and paste the entire piece of code into the box that says “Pinterest Confirmation” in Yoast and click save.
Step 2: Enable Rich Pins
Rich pins are different from regular pins on Pinterest in that they include a little extra information. Pinterest describes rich pins as the following:
“Rich Pins show metadata right on the Pin itself, giving Pinners a richer experience and increasing engagement. Information in a Rich Pin is independent of the Pin description, ensuring that important information is always tied to the Pin. There are 4 types of Rich Pins: app, article, product and recipe Pins.
Rich Pins work by displaying metadata from marked up pages on your website. Once you’ve applied for Rich Pins, any content on your site with metadata will turn into a Rich Pin when a user saves it.”
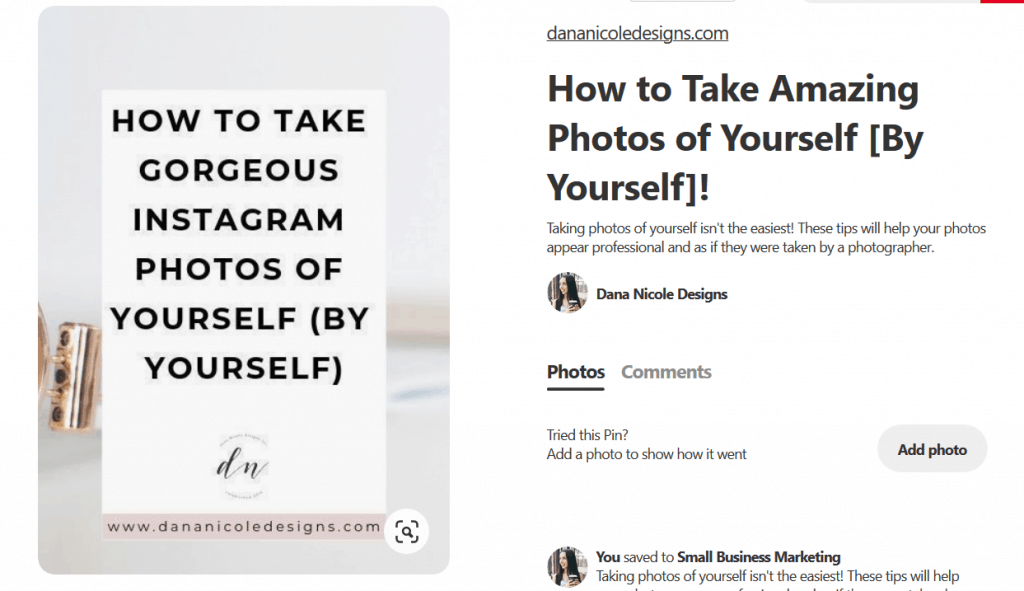
As you can see with my pin above, the title is clearly displayed with my profile, the date the post was published and a link that will take the reader directly to my website that says “read it”.
Rich pins help with your user experience on Pinterest and encourage them to click to your website. There’s no reason why you should not have rich pins!
To add rich pins you will want to download the free version of the Yoast plugin to your WordPress website. Once you have Yoast installed and activated, click “SEO” in your WordPress sidebar and then click on “social”. From there, head into the “Facebook” tab.

Here you will want to enable open graph metadata and save your changes.
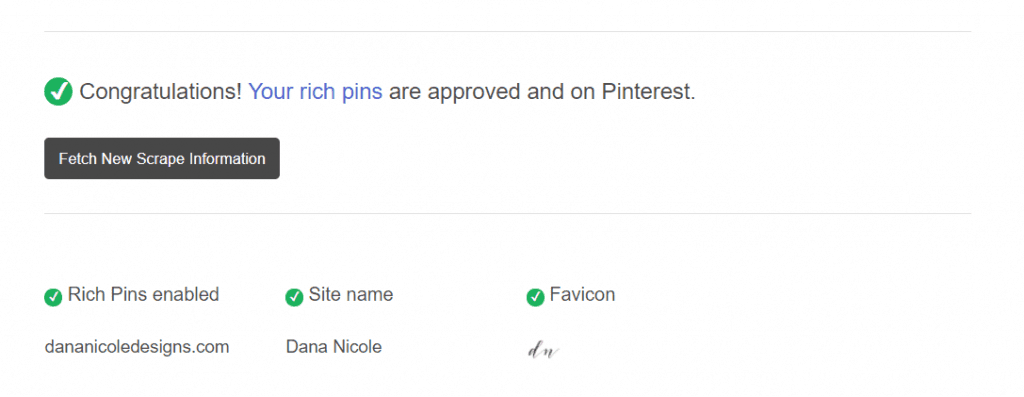
Now, head to Pinterest’s Rich Pin Validator and input a URL to ANY blog post from your website. That’s all there is to it! If you have successfully enabled rich pins you will see the following message:
Step 3: Optimize Your Pinterest Profile
Let me tell you something: Pinterest is not a social media platform as much as it is a search engine.
Rather than group Pinterest into the same category as Instagram and Facebook, start thinking about it more like Google.
So what does that mean? Well, it means you’re going to have to brush up on your SEO a little bit. But don’t worry, I’ve got this beginner guide to SEO that will get you all caught up on the basics of keywords and all that fun stuff.
First, update your profile photo so it is a clear photo of yourself. Nothing blurry or grainy. Your profile photo is the first thing most people are going to notice when they get to your profile, so make sure it’s good quality.
Next, update your “About You” section to reflect who you are and what you do. This is where SEO comes into play.
You’ll want to use keywords and sprinkle them throughout your profile. In your “About” section, use keywords that you want to be found for.
My bio for my profile says: “providing small business tips for biz owners and bloggers so you can grow your business through strategies that work.” The keywords I am targeting here are small business tips and grow your business.
Next, go through all of your boards and make sure what you have visible is relevant to your business and make any boards that aren’t relevant, secret.
For example, if you are a food blogger, keep your makeup board secret as it will just look confusing to anyone who lands on your profile, or make a separate account to house all your personal-type pins.
Within each Pinterest board you have, edit the name and description so they both incorporate more keywords that you think your target audience will be searching for to find the articles you write.
I’ll occasionally see Pinterest boards with cute names that aren’t descriptive and don’t include keywords – you’ll need to make sure to avoid this because it just doesn’t work with your Pinterest SEO.
And remember: don’t be spammy and try to stuff keywords in. Keep it natural!
Step 4: Optimize Your Pins
Pinterest is a very visual platform, so make sure you have visually appealing pins!
A visually appealing pin usually has:
- Easy-to-read text
- A clear graphic
Crafting the perfect titles for your content goes a long way when you only have a few seconds to grab the attention of your audience.
Also, images that are long and rectangular do better than ones that are shorter. For each blog post, I try to make 2-3 different pinable images.
When you create a pin, add this piece of code into your image to let Pinterest know what you’d like the description to be:
<img src=”http://www.yoursite.com/yourimage.jpg” data-pin-description=”Your Pinterest description goes here”>
See that “data-pin-description” tag above? Copy and paste that into your image code.
The reason you will want to use this instead of using the alt tag for your description (what many people recommend to do) is that the alt tag is for SEO purposes only. The alt tag is meant to describe the image in case someone isn’t able to see it.
Using the alt tag for your Pinterest descriptions can get you penalized by Google. The easiest way to fix this? Use the “data-pin-description” label above!
I like to write out a few sentences with keywords, and then list a couple of keywords at the end for my Pinterest descriptions. For example, for the images on this blog post I’ve written the following for my alt tag: Learn how I used Pinterest to increase my site traffic from 800% from Pinterest alone! | Pinterest | Pinterest Strategy | #Pinterestmarketing
Step 5: Find Keywords For Your Pins
This is a super important part to Pinterest that is often overlooked. Above I mentioned how I incorporate keywords at the end of my Pinterest descriptions.
To find keywords, start by typing in your general topic into the Pinterest search bar:
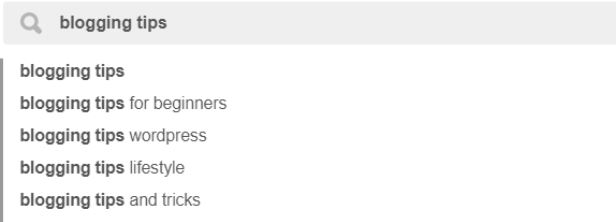
This brings up various keywords! If I were to write a post on blogging tips, I’d include keywords such as “blogging tips for beginners | blogging tips wordpress | blogging tips and trick” etc.
You can also search for the keyword and see what else Pinterest suggests:

We are given even more ideas by doing this such as “blogging tips tumblr, blogging tips writing, blogger” and so on.
After playing around with a couple of different combinations and keywords, you will have a decent-sized list of keywords to include in your pin descriptions!
Step 6: Start Pinning
Pinterest favors users who are active on the platform. Just like many other social media platforms, your content will be shown more if you are actively participating.
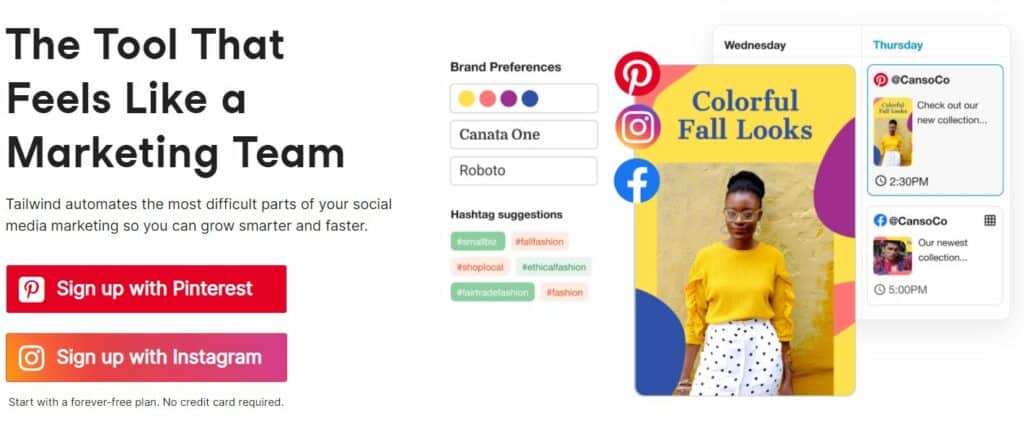
Some people find it hard to pin throughout the day (especially if they have other jobs) which is where Tailwind* (affiliate link) comes in.
Tailwind is an auto pinning app, so you can plan your pins all in one day and set them to pin periodically through the week for you.
Tailwind is the most robust and best Pinterest software that I have come across. You are able to plan what you pin to each of your boards so easily.
And while these are my personal results, Tailwind also publishes the typical results of Tailwind members, so you can see what results look like for the member!
Want to try Tailwind for free to kick off your Pinterest marketing strategy? Sign up here for your free account!
Step 7: Encourage Users To Pin Your Site Content
Adding multiple images to your content will increase the likelihood that something will be pinned.
If you want, you can also add your own custom “Pin It” buttons to your images. I have designed over 50 buttons and written up detailed instructions for how you can create your own Pin It buttons for your website — no coding required.
Another way I encourage people to share my content on Pinterest is to ask them! In various blog posts, my call-to-action is asking them to share/pin my content if they found it useful. If you ask your readers to do something, chances are high that they will follow through!
Step 8: Analyze Your Content
Your Pinterest marketing strategy would not be complete if you didn’t do some analytical work.
I cannot stress enough how important it is to go look at your analytics and see how your pins are doing. I use Pinterest’s analytics as well as Tailwind’s to see which pins are performing well and which ones need to be revamped.
Tailwind also has a great feature where you are able to see which pins of your are the top performers, so you can re-schedule them to be pinned, and continue to gain exposure to your account.
Conclusion: Pinterest Marketing
Here’s a quick recap of your how to develop a Pinterest marketing strategy:
- Get a business account
- Enable rich pins
- Optimize your profile
- Find keywords for your pins + optimize your pins
- Pin strategically (Tailwind can help)
- Encourage visitors to share your content on Pinterest
- Analyze, analyze, analyze
If you found this post useful, I’d love a share!
This article may include affiliate links. As an Amazon Associate I earn from qualifying purchases.

Dana Nicole is an award-winning freelance writer for MarTech/SaaS who was rated one of the best SaaS writers by Software World. She specializes in writing engaging content that ranks high in search engines and has been featured in publications like Semrush, ConvertKit, and Hotjar.
Dana holds a Bachelor’s degree in Business Administration and has over 15 years of experience working alongside national brands in their marketing departments.
When Dana’s not working, you can find her dancing en pointe, cooking up new recipes, and exploring the great outdoors with her two big dogs.
This is so very helpful for aomeone who is just starting out!