Last Updated on
Tired of never being able to post cool photos of yourself to your social media or blog? In today’s article, you are going to learn how to take pictures of yourself without needing a professional photographer or someone else to get the perfect shot.
As a content creator, you know firsthand how many photos you need to take until you get the perfect shot. But asking your friends or family members to take a zillion photos of you in *slightly* different poses is somewhat uncomfortable.
I personally love to take photos of myself rather than ask people to take them for me. When I’m taking pictures on my own, I don’t feel pressured or rushed to get the shot I’m looking for, and I don’t feel bad when it takes forever.
So today, I’m sharing all my tips and tricks to take good pictures of yourself. Whether you are traveling solo, need an outfit picture or you just prefer to be in charge of your own photography, these tips will help ensure your photos look flawless and professional.
This post contains affiliate links. When you click on a link within this post and make a purchase, I will earn a commission. This is at no additional cost to you.
Tips to Take Good Pictures of Yourself With a Phone or Camera
Have you ever asked yourself, “how can I be more photogenic?” These tips will not only help you look good in your photos, your confidence will radiate through once you learn to take a good selfie.
1. Shoot from Above
Images are more flattering when they are shot from above. To see for yourself, open up your front-facing camera and look down into it, and notice how much better you look as you raise the camera up.
If want to take a selfie, position the camera from slightly above to achieve a more aesthetic photo.
It’s also good to experiment with different angles. While one angle might work for someone else, it might not work for you. Move your camera around, have it close and far away, and try out different angles to see if you can capture the perfect selfie.
2. Use Even Lighting
Harsh shadows and highlights are not the keys to a good selfie (unless you are artistically going for something like that).
Try to get an evenly lit photo as much as possible.
3. Use Natural Lighting
Indoor lighting can cause lots of unwanted hues (such as yellow or blue) into your images. When possible, try to use natural light as often as you can. Natural light will keep your portrait photos bright, airy and beautiful.
4. Keep Composition in Mind
When taking your photo yourself, you’ll want to be mindful of where you are positioned! Generally, you can’t go wrong with the rule of thirds, in otherwise, positioning yourself off-center.
The rule of thirds divides photos up into 9 sections vertically and horizontally.
When planning the composition of your photo, arrange the main subject to appear where the lines intersect. Try this the next time your taking pictures of yourself.

5. Avoid the Front Camera (on Phones)
The front camera on your phone is distorting your face, and if you’ve ever wondered why you might look different in the mirror than you do when you open up your phone’s front camera, it’s because of the lens and perspective distortion.
When possible, you should use the back camera on your phone. The easiest way to use the back camera is to use a mirror. Hold your phone up in front of the mirror so you can make sure your face is in the shot.
6. Find Somewhere to Place Your Camera
There are two different ways you can take good pictures of yourself:
- with a tripod
- without a tripod
Using a Tripod
If you want to take full-body pictures of yourself, you’ll need a tripod.
There are different types of tripods you can get depending on the content you plan to shoot and what camera you’ll be using.
I’m going to talk about two different ones in particular that I think are super useful for bloggers and small business owners who want to take Instagram photos by themselves.
The first one is a smaller tripod with bendy legs that can attach to different objects.
If you plan to use a phone, you can consider a smaller tripod like this one which also comes with a remote so you don’t need to rely on your self-timer.
The bendy legs give you the ability to get really creative where this guy goes!
Although that one does have the ability to put a camera on it, I wouldn’t risk putting anything heavier than my iPhone on something so small.
For a camera, a regular old tripod will do the trick!
Having a tripod will give you the freedom to get shots from different angles without you needing to hold the camera.
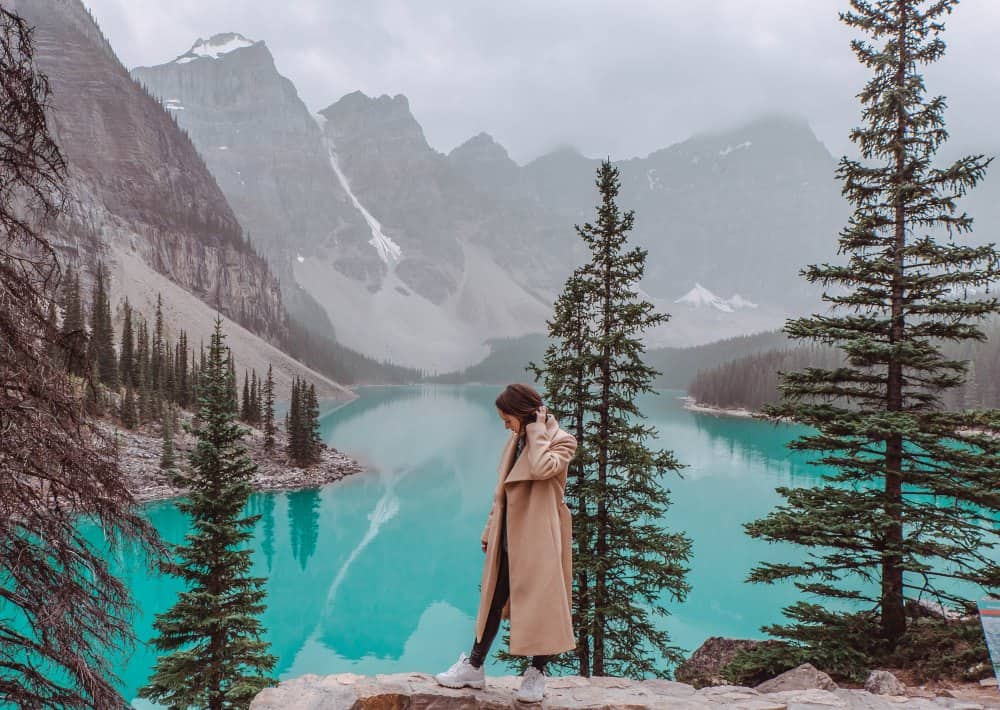
Here is a photo that I took by myself using a tripod:
I edited this through Photoshop and applied a Lightroom mobile preset on it to add in the finishing touches!
You can use the free Photoshop app for your phone if you want to create fun images.
Without Using a Tripod
You can still take pictures of yourself without a tripod, but I don’t always recommend this method.
If you are taking photos at home, you can place your camera on a ledge and feel confident that it won’t come crashing down and shatter.
But if you are out in public…I do not recommend this.
A sudden burst of wind may cause your device to pull a humpty-dumpty and have a great fall.
Proceed with caution if you choose to use a ledge outdoors!
Another simple solution is to use a selfie-stick. I know—selfie sticks have bad reps—but they are quite helpful if you prefer to hold the camera rather than set it on a ledge.
7. Get a Camera That Connects to Your Phone
While the self-timer is a great feature, having a camera with that connects to your phone is a game-changer if you want to take pictures of yourself that look like they were taken by a photographer.
Here’s how a self-timer works: you place the camera somewhere (whether on a surface or on a tripod), you set the self-timer for five seconds, you run into place, your camera takes the photo, and then you run back to check the photo to make sure you were in the frame (and likely do this many more times until you get the shot you want).
This process is a bit clunky and wastes lots of time!
Especially if you are taking photos of yourself in public spaces where you want to get a picture as quickly as possible.
The solution is to find a camera that can connect to your phone. When your camera connects to your phone, you’ll be able to snap the photos through your phone AND see exactly how the photo looks on your phone. I have been using the Fujifilm X-T10 for years now and absolutely love it because it has this feature.
On top of the amazing quality of photos that I get with the FujiFilm X-T10, it also has WiFi. So instead of setting a self-timer and running back and forth to see whether I got the shot, I can hook my camera up to my phone (even if I’m in a place where there is no WiFi or data) and I can actually see what my camera sees on my phone!
I took this photo of myself using the Fujifilm camera app:
Related readings: (clicking these links will open a new tab, so feel free to click on what you want to read next without losing your reading spot on this post!):
- How to Change Colors in Photoshop: The way I edit my Instagram photo so it’s pink and how you can edit yours any color you’d like.
- How to Grow Your Instagram Account in 2019: New strategies and tips to help you organically grow your Instagram account in 2019
- How to Get Your Instagram Photos Seen By Thousands: Use my tiny hack to help get incredible exposure to your Instagram account!
- How to Get Paid to Post on Instagram: 5 easy steps that will help you begin to make money from your Instagram account.
- 8 Props Every Blogger Needs For Great Instagram Photos: The best props to capture gorgeous images for your Instagram
- How to Start a Blog on Instagram: You can start a blog without having a website by using your Instagram – learn how here!
8. Go Out Early
This is for those of you who need to take pictures of yourself but are a bit shy to do it alone in public.
I can totally understand that feeling.
Realistically, the people watching you take a picture of yourself probably aren’t going to think twice about it and you’ll never see them again, but if the thought of taking photos of yourself in public is making you nervous, go out before the crowds!

I’ve heard of lots of content creators who will get out early in the morning to avoid having the crowds in their photos, but they also have the added bonus of not having to put on a show for everyone around them!
Plus, if you batch your content and are able to get several different shots in one time, you won’t need to go out every single day at the crack of dawn.
9. Get a Ring Light
If you prefer to take photos of yourself indoors (where the natural light is minimal), a ring light is a must!
Ring lights brighten up the subject (you), getting rid of any unwanted shadows, brightening up the skin and making you look like a model on the runway.
Many beauty influencers and YouTubers swear by using a ring light to help them get those professional-looking shots by themselves, at home.
10. Use Continuous Mode
Trying to take good pictures of yourself can be a tedious process if you are constantly running back to your camera to see if you got a good shot. The solution? Use continuous mode! Continuous mode is when your camera takes a burst of photos (which is why this is also known as burst mode) for a set amount of time.
Doing this will allow you to change your position several different times, ever so slightly, so that you can get about 50 or more different photos in thirty seconds. It’s a great way to make sure you have lots to work with!
11. Batch Your Photos
Batching is a very effective strategy to get a lot of work done in a short window of time. Batching is essentially doing the same task for a set amount of time, rather than jumping from task to task. If you are just taking one photo of yourself, then you can skip this step, but if you plan to take many photos of yourself, consider batching your tasks.
For example, if you are planning to take photos of yourself for Instagram purposes, your first batch task could be to take many photos all at once. In this case, you’d likely want to pack different outfits so that you don’t look the same in each photo.
For your next batch task, you could choose to edit all said photos from your photoshoot.
Batch tasking has been an effective way to stay laser-focused on one task to ensure you aren’t jumping around too much, which can result in decreased productivity.
I once packed a little suitcase full of different hats, jackets and accessories, and went and took various photos. I prefer to get as many photos as possible in one day.
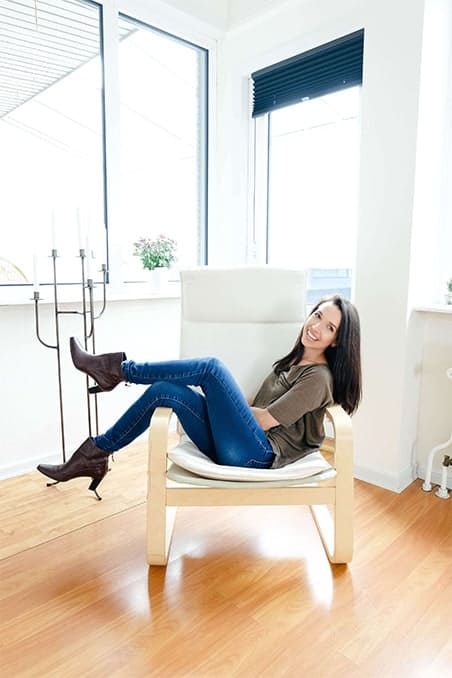
12. Use Angles and Lines When Posing
I got this tip from my sister a few years ago and it was the single best posing tip I’ve ever got.
Use your body to create different angles for your poses.
Angles and lines make photos pleasant to the eyes and are simple to incorporate into your poses in so many different ways.
Take this photo for example:
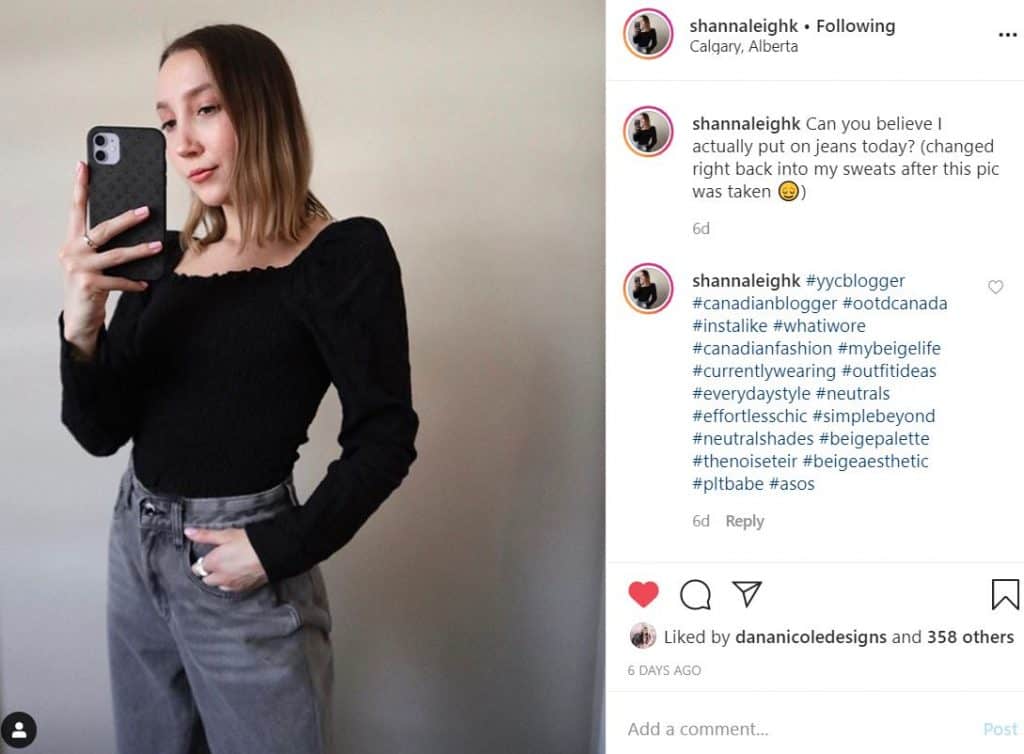
The hand in the pocket creates a bend at the elbow, aka an angle!
There is so much more dimension to this photo simply because Shanna chose to create this angle, rather than leave her arm hanging awkwardly at her side.
Here’s a photo of myself where I’ve incorporated some lines (notice my arms):
However, let’s take a look at this (boring) photo:
In this image, I’m standing square in the center with my arms hanging limply at my sides. Truthfully, it’s a boring picture!
So, if you want to know how to take a full-body selfie that is dynamic and interesting to look at, add angles.
Here are some ways you can add lines/angles into your poses:
- step your leg out to the side
- take a photo walking
- sit on the ground and lean to one side
13. Incorporate Movement
Movement in photos is another way to capture dynamic pictures of yourself.
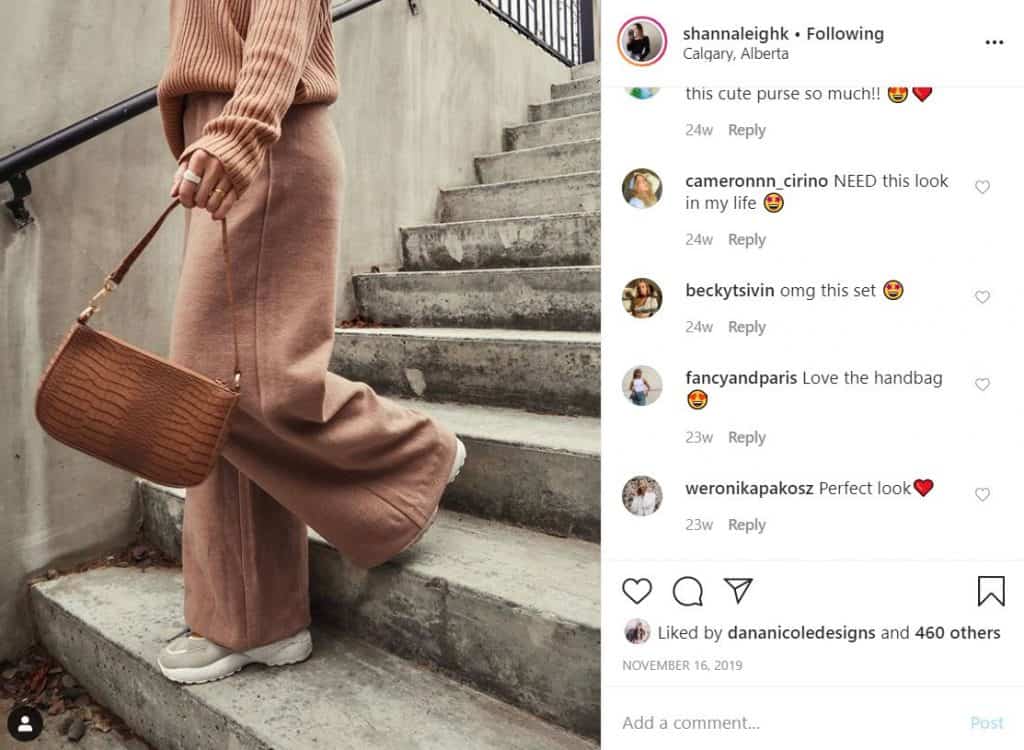
In the photo above, the purse is swinging and the subject is walking. There’s a lot of movement going on in this still photo, which makes it intriguing and interesting to look at.
14. Look Away From the Camera
Another overlooked tip when taking a photo of yourself is to look away from the camera. This isn’t a hard-and-fast rule (some photos look great if you’re staring into the lens).
But some look better if you’re gaze is elsewhere.
Take this photo for example:
I could’ve easily stood there, smiling at the camera (and I do have a few shots like that) but I like this one because it feels less staged.
It’s all about the feel and look you’re going for!
15. Ask a Friend
So technically this post is about how to take good pictures of yourself (by yourself), which is why I included this tip last.
However, I think it’s important to mention that it’s ok to ask for help once in a while.
Here’s my advice for getting a friend to take a photo for you.
First, get everything set up so that your friend literally just needs to click the camera’s shutter button. You don’t want to be asking your friend to set up the framing for you because if she/he is inexperienced with photography, they most likely won’t be able to get the shot you want.
So set it up for them!
I get my husband to stand where I’d like to stand and I take a picture with him in it so that I can show him what I’m after. I’ll then set up the camera and get him in position so that all he needs to do is take the photo.
16. Find Your Photo Editing Style
Getting the perfect shot is only the first step to good photos. Your last task is to edit your pictures so they look put together and cohesive!
Let me show you just how important editing your photography is.
Here’s a good example. Swipe to see the difference a preset makes:
It goes from being a good picture to an even better picture through simple edits!
You’ll likely need to experiment before you can find something you like, which is ok!
You can also find inspiration by searching up various Instagram feed theme ideas to see what style really speaks to you.
Now You Know How to Take Good Pictures of Yourself!
With the right supplies, figuring out how to take good pictures of yourself is really not that hard. You can always ask a friend to help but it’s definitely not necessary!
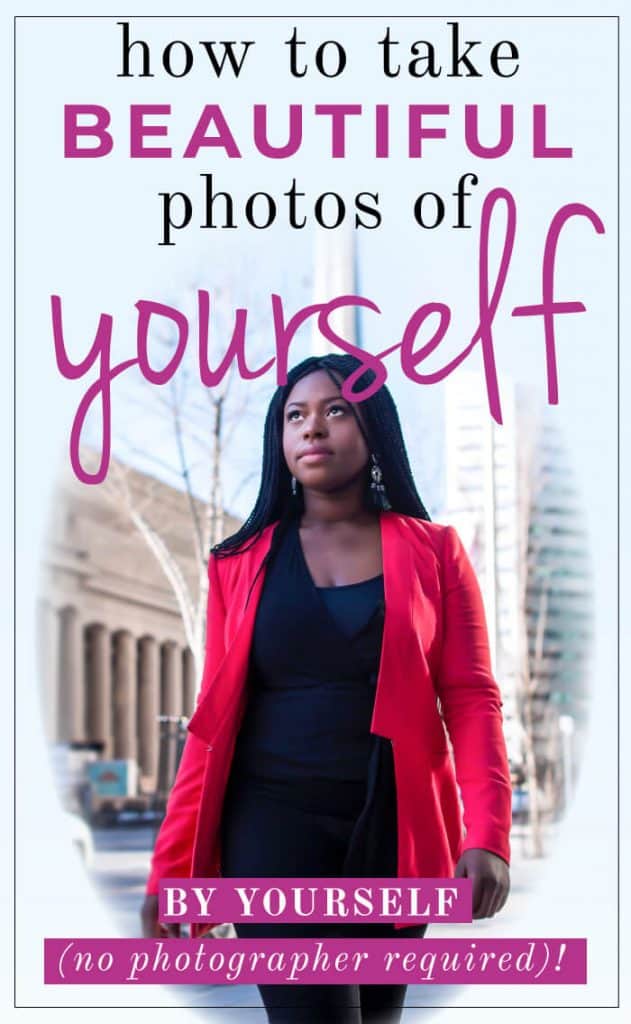
Pin me:
This article may include affiliate links. As an Amazon Associate I earn from qualifying purchases.

Dana Nicole is an award-winning freelance writer for MarTech/SaaS who was rated one of the best SaaS writers by Software World. She specializes in writing engaging content that ranks high in search engines and has been featured in publications like Semrush, ConvertKit, and Hotjar.
Dana holds a Bachelor’s degree in Business Administration and has over 15 years of experience working alongside national brands in their marketing departments.
When Dana’s not working, you can find her dancing en pointe, cooking up new recipes, and exploring the great outdoors with her two big dogs.
Great tips! I want to up my instagram game, and show “me” more. How do you set up your tripod in public if it’s the little bendy one? Do you have to shoot near a ledge or bench?
Hi Michele! You will need something to attach it to but you can also set it up as a regular tripod to stand, but remember that it just won’t have the height that a regular tripod will, which is why attaching it to something is ideal to get that height!
These tips are amazing! We can tell you truly know your photography 🙂
I take photos for Instagram and don’t take them by myself as thankfully I have my partner to do it with me, but hopefully one day I’ll take my own photos and use your tips!
Julia x