Last Updated on
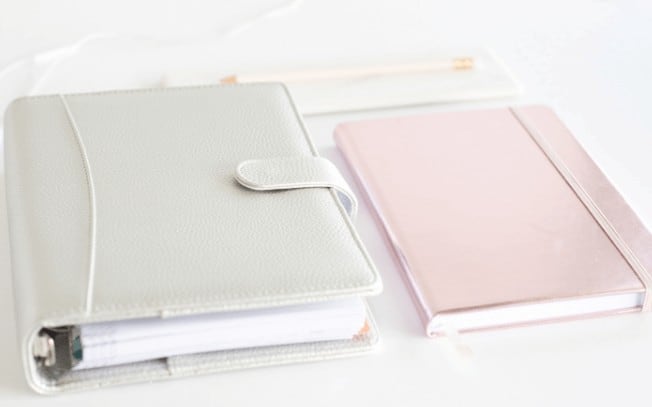
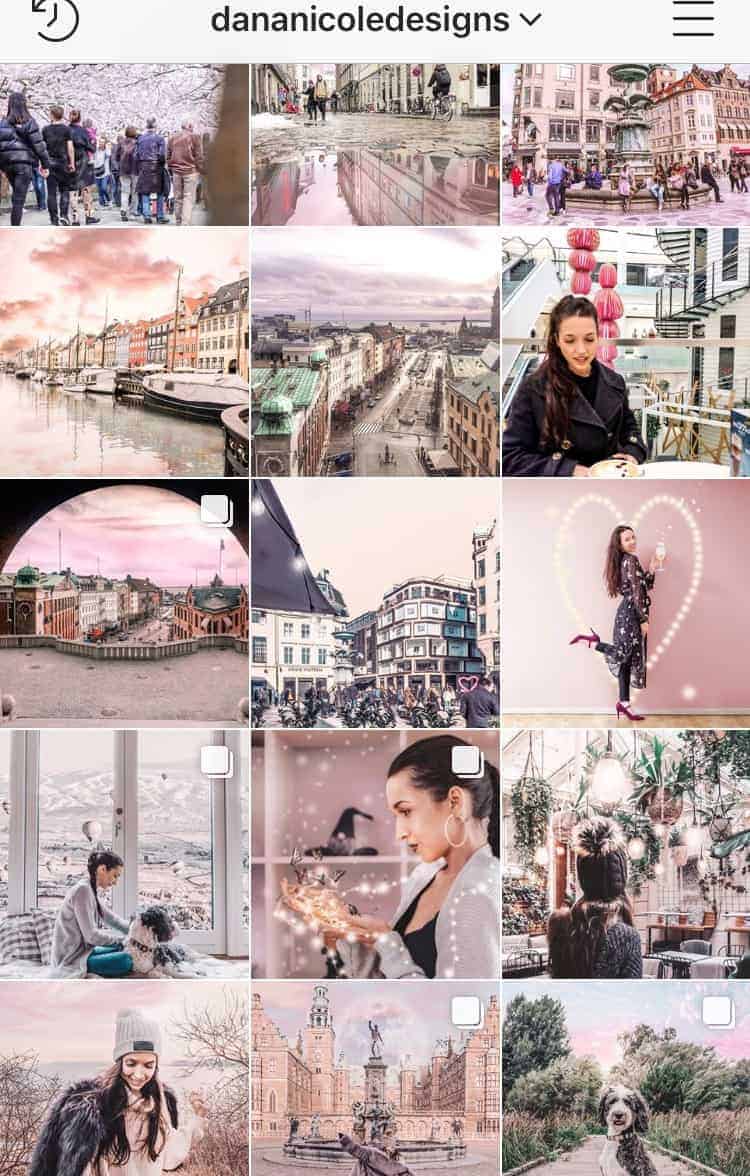
One question I get through my DM’s on Instagram quite often is what preset I use on my photos to make everything pink!
While I can sometimes photography pink objects to achieve a photo that is pink, that isn’t the case and often I need to edit the photo so that it’s pink.
Today, I’m going to be showing you how I give my Instagram feed a very feminine pink feel to it. The tricks I’m going to show you today aren’t just limited to pink either – feel free to choose whatever color(s) you’d like your feed to be!
First off, you’ll need Photoshop (affiliate link) if you want to change an object’s color.
It’s no secret that I use Photoshop on my images. I try to be very transparent about how highly edited my images are.
You can purchase a Photoshop subscription for only $9.99 per month, and as a bonus, you will also get access to Lightroom and Adobe Spark. Lightroom is another great tool for editing photos and Adobe Spark lets you create gorgeous graphics (such as Instagram stories).
All these programs can help you with your Instagram. I highly recommend using these professional tools!
Here is one method I use to achieve my pink Instagram feed (and how you can achieve any color Instagram feed you want as well).
There are a few different methods you can use if you’d like to change colors in Photoshop, but I’m going to show you the easiest method!
At the end of this post, I also have a video tutorial walking you through the steps in case you prefer to learn via video.
Changing the Hue of Certain Colors
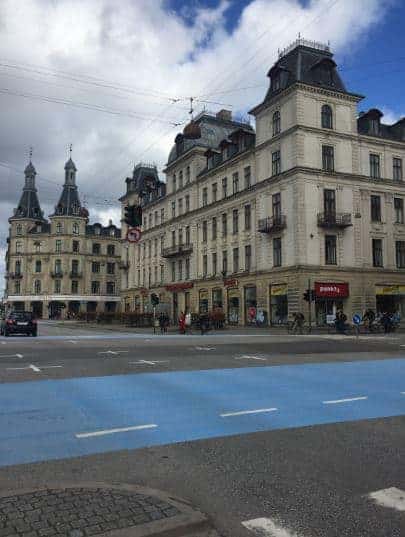
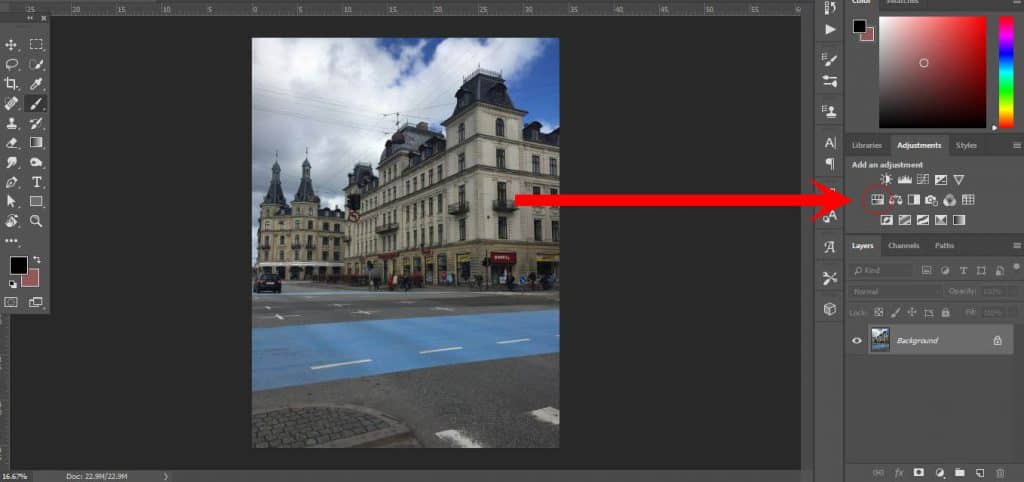
In the below photo, I am going to change the blue stripe on the road to pink.
To open your photo in Photoshop, you can drag and drop the image and it will open the below workspace.
To start, look over to the right of your dashboard until you see the icon I’ve circled below. You will want to make sure you are in the “adjustments” tab (the video shows this in much more detail).
This is called “hue/saturation” and will allow you to adjust specific colors!
When you click on that, a bunch of sliders will come up.
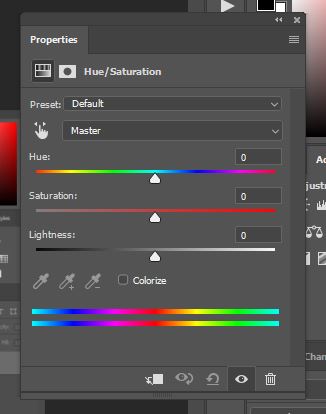
If you accidently slide something and you want to reset it, all you need to do is type “0” into the box above the slider!
To change the color, you will first need to find that color in the dropdown menu. Where it says “Master” you are going to click on that in order to open the hue dropdown menu.
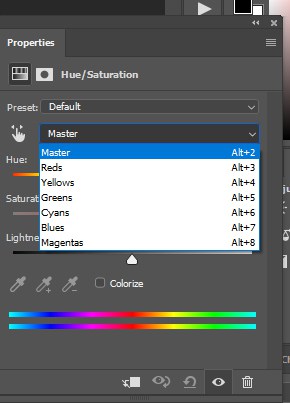
In this case, we want to adjust the cyan because the color of the line I would like to change is more on the cyan side.
If you watch the video at the end, you’ll see that I can adjust both the blue and the cyan sliders, but the cyan is a better choice.
So now let’s start by adjusting the cyan! I will then click on “cyan” from the dropdown menu and will start sliding the slider named “hue” until I find a shade of pink I like.
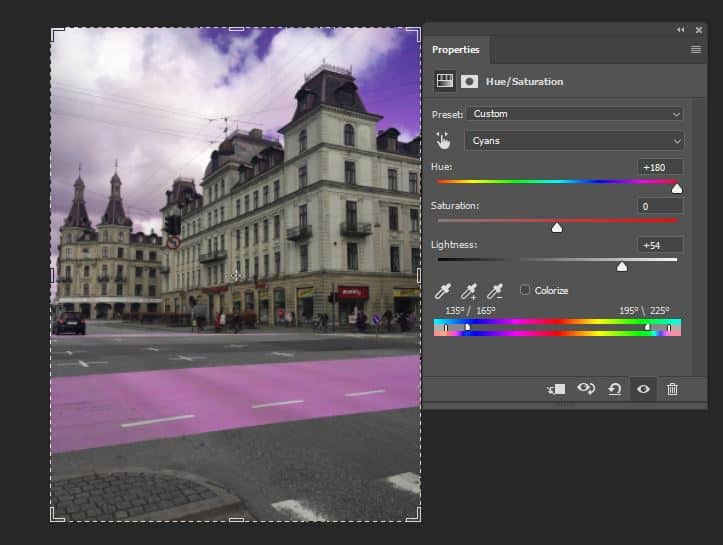
So now what I’ve done is I’ve taken anything that was cyan, and turned it into a pink/purple color.
Take a look at the sliders! You can see the hue has been turned to pink, and I’ve also increased the lightness. You can experiment with the saturation and the lightness to achieve the perfect tone to your image.
You can also see how I can change it to another color just by change those sliders:

This is a very simplified way to change colors, and you might be happy with that, but you also might not be totally impressed because if you take a look at the sky, the sky has also been affected and you might not want your sky to appear different.
Luckily, the next step will address how we can fix that!
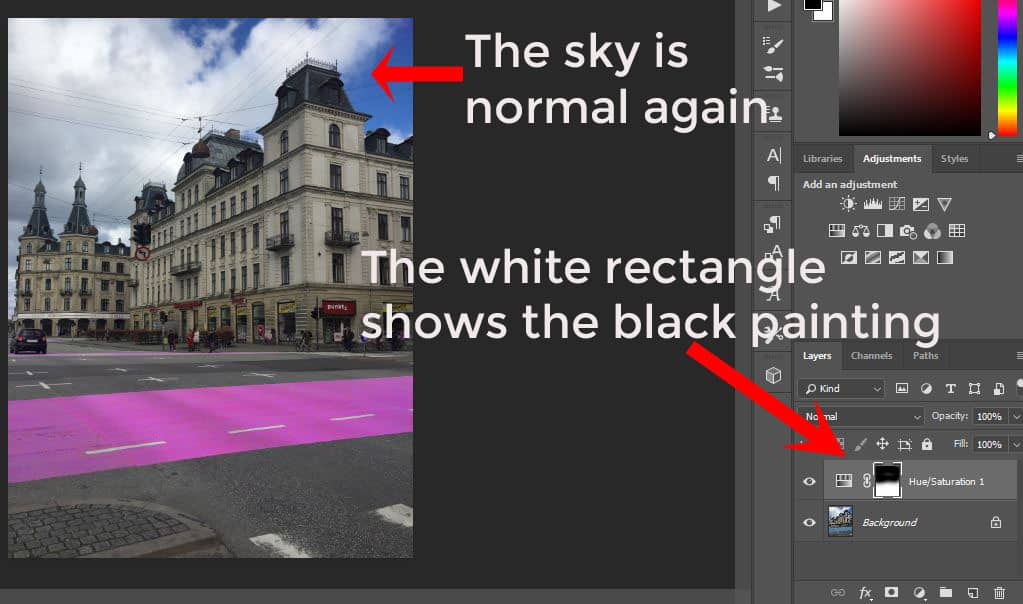
Masking Out Unwanted Hues
If you’d like to essentially “erase” the hue/saturation adjustments from specific items, you will want to click once on the white rectangle that is circled below.
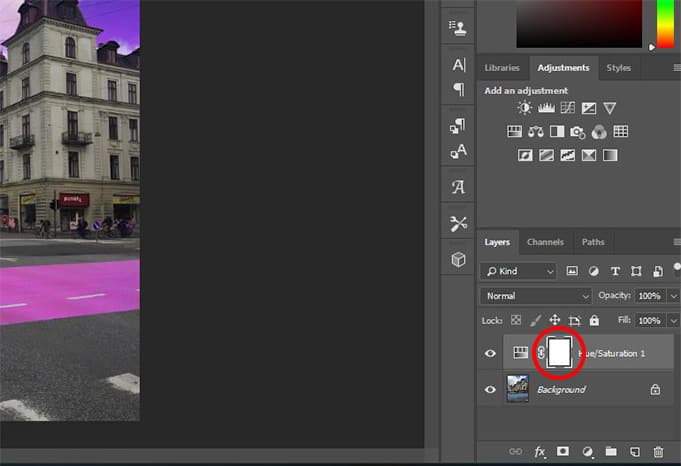
When you click once, you will get a white border around it (as pictured) to let you know it has been selected.
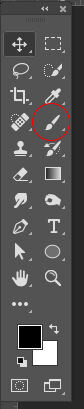
Now, hit “b” on your keyboard (which is the shortcut for the brush tool) or find the brush tool and select it. The brush tool looks like this:
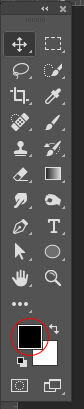
Next, make sure that you have the color black selected. If black isn’t selected, double click on this square and choose black.
Now with your paintbrush selected, you will want to paint the black over top of anything that you do not want the hue and saturation to be applied to!
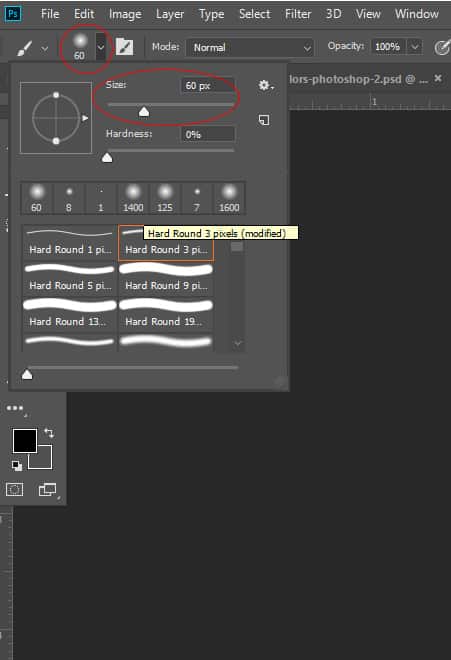
If you need to adjust the size of your brush, you can do so here:
Now just paint the black right on your photo, wherever you’d like it to be back to normal!
This is called “masking” and you are essentially telling Photoshop not to apply a specific setting to anything that has black painted over it.
Because we clicked on the white rectangle above, you aren’t actually going to see any black on your image, but you will see it show up on the white rectangle as you paint, like the image below shows.
Save Your Photo and Edit as Normal
Once you have changed your object to the color you’d like, it’s time to edit your photo as normal!
I use a combination of techniques with my photos and each one is different.
I use different Lightroom presets on different photos depending on what look I’m going after. The main thing I do to get such a pink feed is to ensure there is always something pink in my images (which is what we have discussed in this article).
Tips for Changing Colors in Photoshop
The above method is the easiest way to change colors in Photoshop if you are new to Photoshop and a beginner.
Here are a few tips if you want to change colors in Photoshop.
Try Different Colors
When you are using the dropdown for the hue/saturation tool, you might think you know what color you are trying to target but in reality, you might be targeting the wrong color.
For example, grass can often have lots of yellow in it as well, so if you are trying to change the color of the grass in a photo and green isn’t working, try using yellow.
For other objects, you might need to play around with different colors until you are able to target the hue you are after.
Brush Hardness
When you are masking out objects you don’t want to be changed by brushing black over top of them, you can also try adjusting the hardness of the brush which can be adjusted just below the brush size.
A brush hardness of 100% will result in a circular brush with a hard radius, whereas a hardness of 0% will be a circular brush with soft and feathered edges.
A softer brush is good when you need to blend everything a bit more and I almost always use a brush with 0% hardness.
How to Change Colors in Photoshop: Video Tutorial
Watch this video tutorial as I show you how to change colors in Photoshop. I’ve taken the above steps and recorded myself going through the process so you can see it work in action!
In Conclusion
While I use many different editing techniques on my photos, this one technique is quite easy for beginners to pick up and something that I’ll do if I need to change something specific.
I also experiment with composite image editing, but if you are looking for an easy way to edit your photos to a specific color, the above technique is perfect.
This article contains affiliate links to Photoshop. The price of the product is not increased to account for my commission.
This article may include affiliate links. As an Amazon Associate I earn from qualifying purchases.
Dana Nicole is an award-winning freelance writer for MarTech/SaaS who was rated one of the best SaaS writers by Software World. She specializes in writing engaging content that ranks high in search engines and has been featured in publications like Semrush, ConvertKit, and Hotjar.
Dana holds a Bachelor’s degree in Business Administration and has over 15 years of experience working alongside national brands in their marketing departments.
When Dana’s not working, you can find her dancing en pointe, cooking up new recipes, and exploring the great outdoors with her two big dogs.