
Last Updated on
Lightroom mobile presets are about to be your new best friend and favorite tool in your toolkit.
I love using presets to edit my photos in a snap and achieve a cohesive Instagram feed theme but not only that, selling presets will be a gamechanger for your passive income.
If you’re wondering how to make and sell Lightroom mobile presets, I’m going to show you two different ways. The first way I’m going to show you will allow you to use the presets on your phone, but you won’t be able to export them or share them with anyone.
This way is perfect for someone who does most of their photo editing on their phone and needs a simple way to speed up the editing process.
The second way I will show you will allow you to share, sell, export or do whatever you want with your presets! Both methods are incredibly helpful, and it’s important to know how to do them both! Oh, and making presets is also incredibly fun!
This article contains affiliate links to the Lightroom desktop app. If you make a purchase from one of the links in this article, I will make a small commission at no extra cost to you.
What is a Lightroom Mobile Preset?
A Lightroom mobile preset is a set of actions that you can apply to your photos to save time and get photos with a similar mood. In the video below, you can see how I click on my preset, and the picture instantly changes.
Here is another before and after photo of one of my Lightroom mobile presets in action:
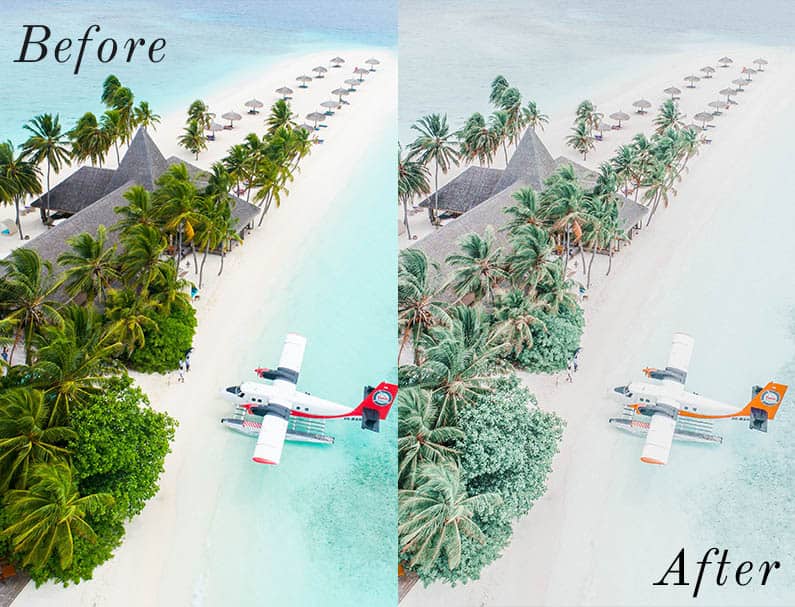
As you could imagine, applying the above preset to other images would give them all a similar look, which can help you achieve consistency with your Instagram theme and make it visually appealing. On top of that, you’ll be saving tons of time in the process.
Two Different Ways to Make Lightroom Mobile Presets
1. How to Make Lightroom Mobile Presets on Your Phone
To make Lightroom mobile presets, you will first need to download the Lightroom mobile app. After you’ve downloaded the app, open Lightroom on your phone to begin.
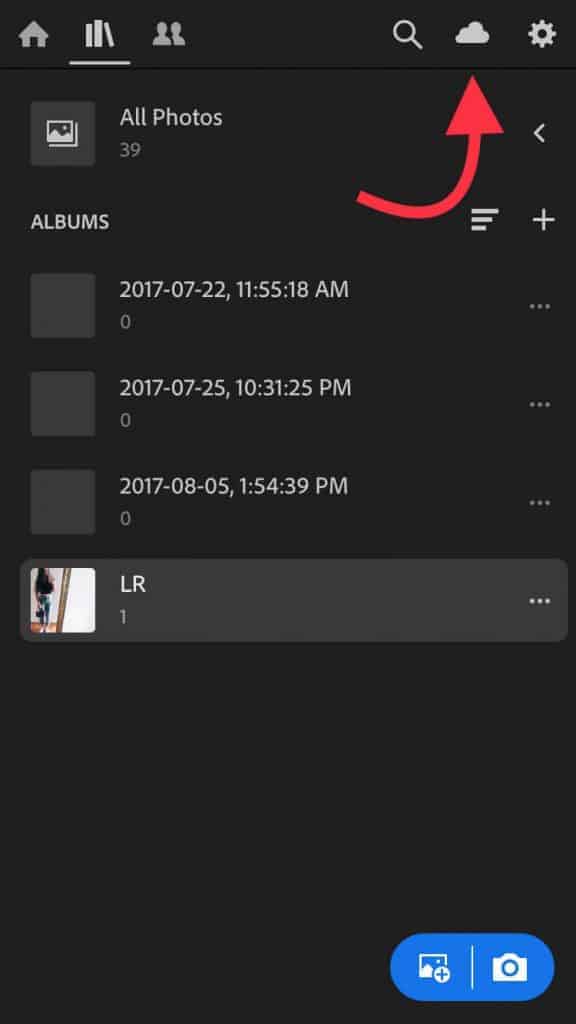
If you have an Adobe Creative Cloud account, now is the time to sign in. You can sign in by clicking on the cloud in the top right-hand corner.
With your Adobe Creative account, you will have access to more features, so if making presets is something you are serious about, I highly recommend signing up for the Individual package. It is currently only $9.99 per month, and with that, you get access to:
- Lightroom
- Lightroom Classic
- Photoshop
- 20GB of cloud storage
If you don’t have a Creative Cloud account, fear not, because you will still be able to create presets to use on your photos (you just might not have access to all of the fancy editing features).
Now, let’s get into making your preset.
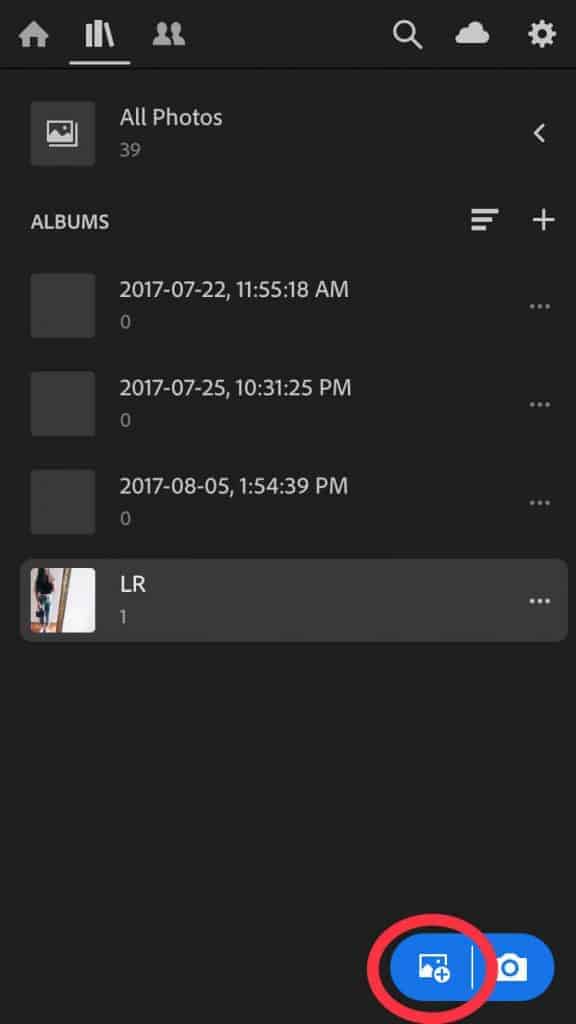
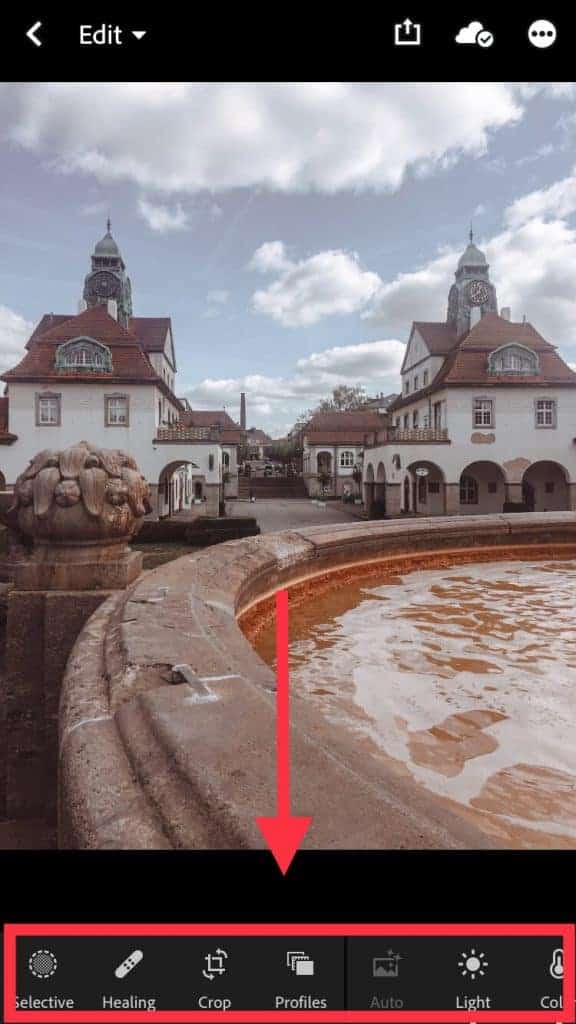
The first thing you need to do is upload a photo.
To upload a photo, click on the plus sign in the bottom right-hand corner. Your camera roll will be brought up, and all you need to do is select the photo that you would like to edit.
Now you are ready to make your preset. Along the bottom of your photo, you will see different adjustments. The first section has the adjustments: selective, healing, crop and profiles. You can ignore these as we want to focus on settings that will change the mood of the image and ones that you can apply to future photos. For example, if you needed to crop your current image, you can certainly do so, but cropping isn’t something you’d want to apply to a batch of images all at once (it’s more something you’d use at your discretion).
Most of the adjustments along the bottom of self-explanatory! For example, if you click on “light”, you will be able to see different sliders that affect the brightness and the darkness of the photos.
I encourage you to play around with them if you aren’t sure what they are to get a better feel for how they affect your images.
Next, to the right of the “light” adjustments, we have “color”. Here’s where you can correct the white balance of your image, but where you can also affect individual colors.
To adjust the colors, start by clicking “mix” in the top right-hand corner of the “color” category.
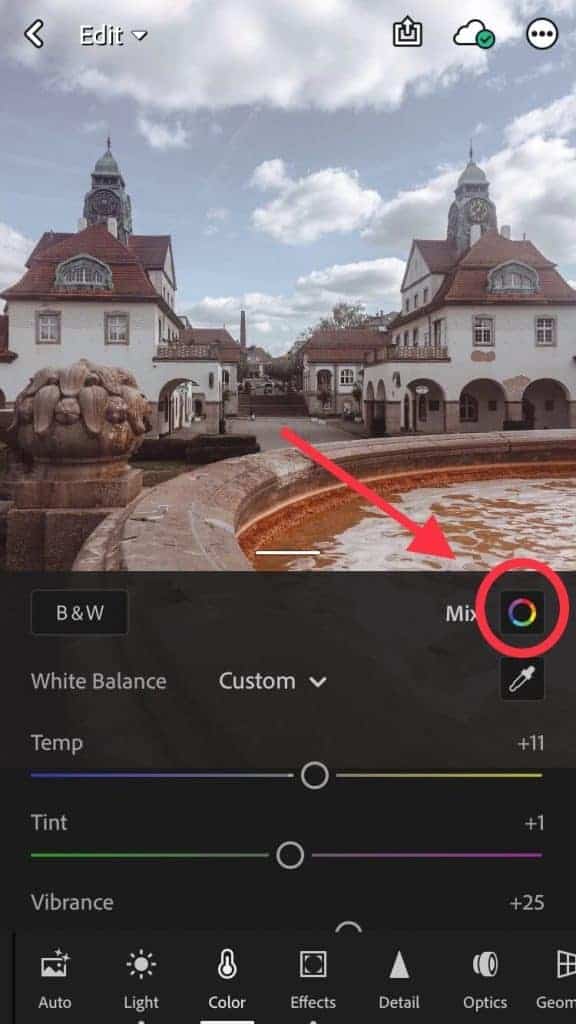
Once you click into “mix”, you will see different colors of circles, and if you click on each one, you will be able to edit the colors by adjusting the three sliders underneath individually.
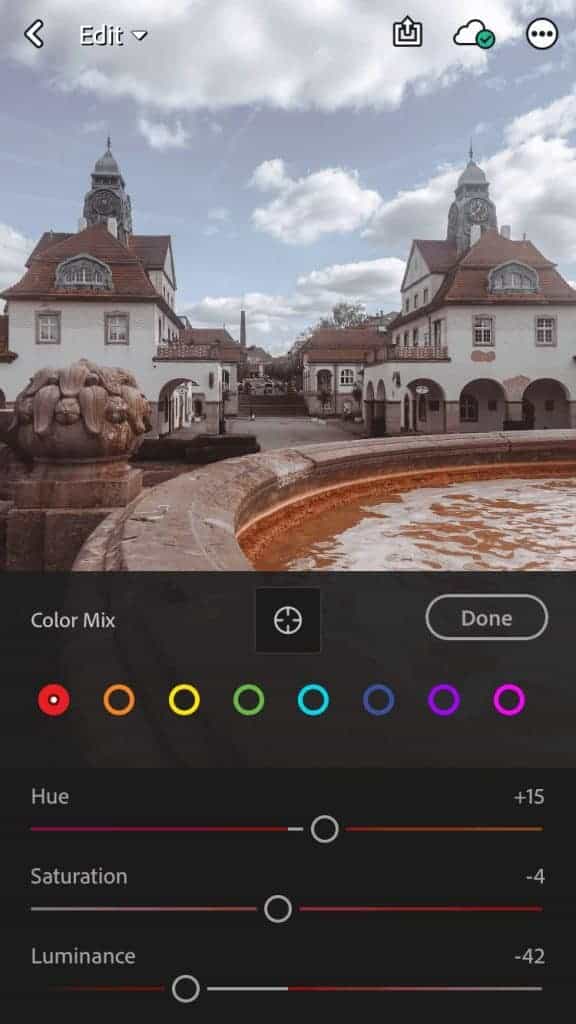
I used to desaturate the blue sky in my imagery, so I’d always lower the saturation of the blue slider. Here’s where you get to add your own personal style and preference! Experiment, experiment, experiment, and see what you like best.
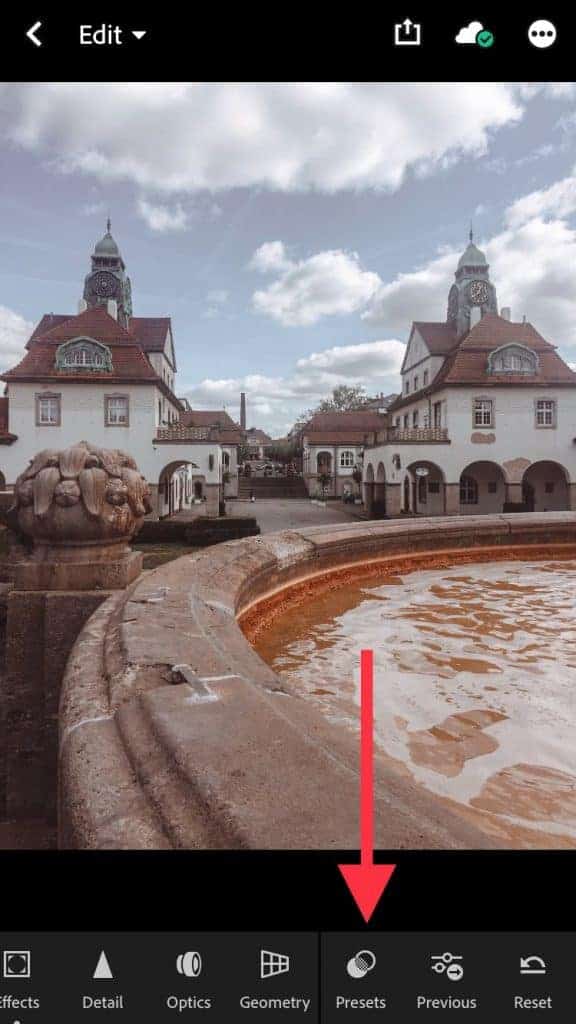
Once you have edited your photo to your liking, it’s time to make your preset.
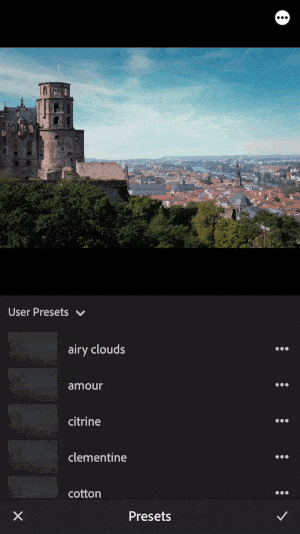
Scroll over along the bottom adjustments to the very end where it says “presets” and click on it.
Make sure that user presets is selected in the dropdown. If user preset is not selected (and it likely won’t be the first time you use the Lightroom app) click on the drop-down menu and scroll all the way down to the bottom and click “user presets”.
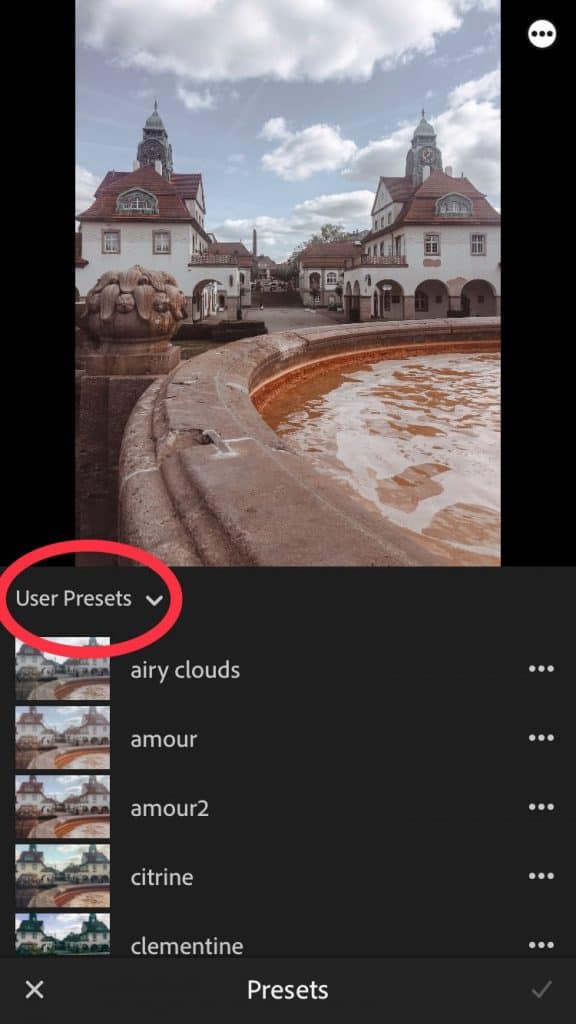
Here is where you are going to find your preset after you create it.
To save your preset, you want to go up to the three dots in the upper right-hand corner then click on “create preset”.
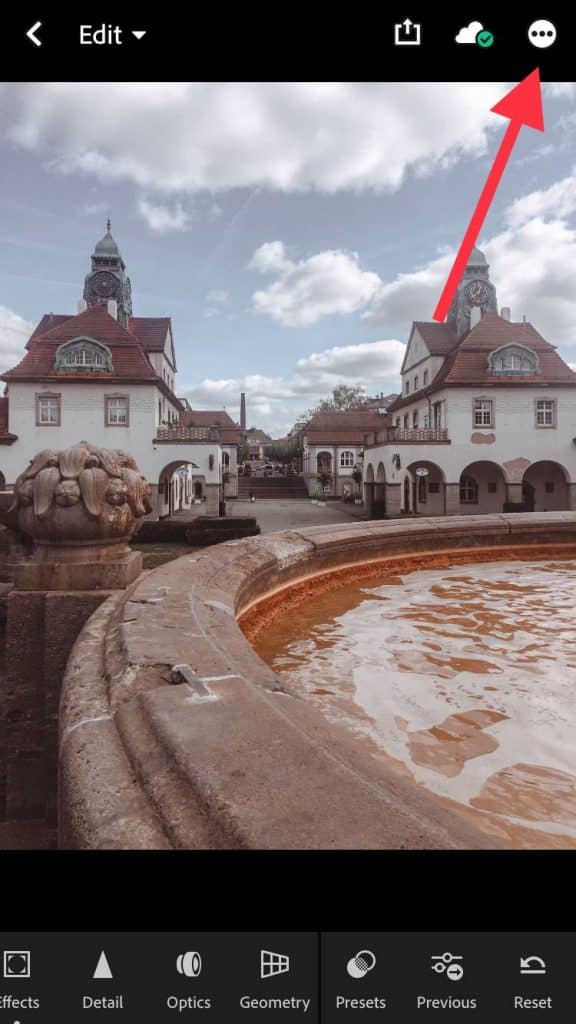
Next, name your preset and make sure that you don’t deselect any of the checked boxes. After you have given your preset a name, click the checkmark in the upper right-hand corner.
And that’s that! You have officially made your own Lightroom mobile preset that you can easily apply to your photos over and over again.
The next time you upload a photo, all you need to do is click on “presets” at the bottom and then select your preset from the list of user presets.
Can You Share Presets on Lightroom Mobile?
Unfortunately, you are not able to share or send presets from Lightroom mobile. If you want to send, share or even sell the presets you make, you will need to use Lightroom CC (which we will talk about next).
2. How to Make Lightroom Mobile Presets in Lightroom CC to Sell + Share
If you plan to sell, share or export your presets after you make them, you will need to have an Adobe Creative Cloud account and use the desktop premium version of Lightroom.
To sell or share presets, you need to be able to export them as a DNG file, which you cannot do with the free Lightroom app.
Like I mentioned earlier the Creative Cloud membership for Photoshop and Lightroom (known as the Individual package) will make your life easier as you’ll be able to create presets that you can actually share and sell. It’s worth looking into if you want to take Lightroom preset creation seriously.
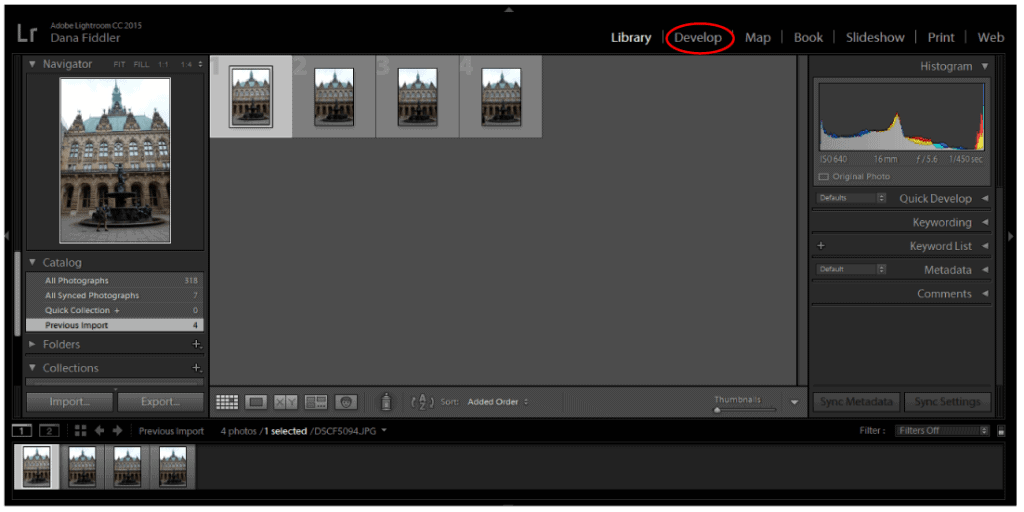
To create your first Lightroom mobile preset on desktop, you are going to need to open Lightroom CC and import a photo. Once your photos have been imported, click on “develop” where you will start editing.
When using the premium version of Lightroom you have much more ability to create presets that stand out (and are different from some of the generic ones that exist) simply because you have access to much better editing capabilities!
One of my favorite ways to edit photos is to add split tones into the shadows and highlights. This cannot be done with the free Lightroom app, which is why it’s essential to become a Creative Cloud member if you want to create high-quality presets. Basic edits won’t cut it.
I also have a detailed Lightroom tutorial for beginners that you should follow along with if you are new to the desktop version of Lightroom.
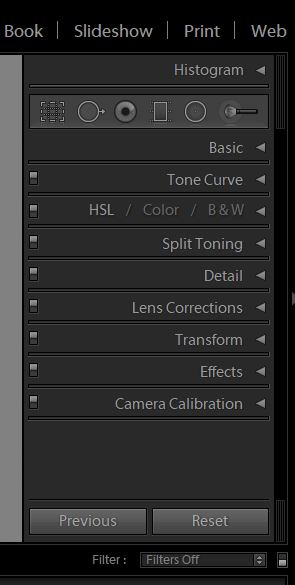
After you have edited your photo to your liking, click on the “+” sign beside “Presets” on the left-hand side of your Lightroom interface, and then click “create preset”.
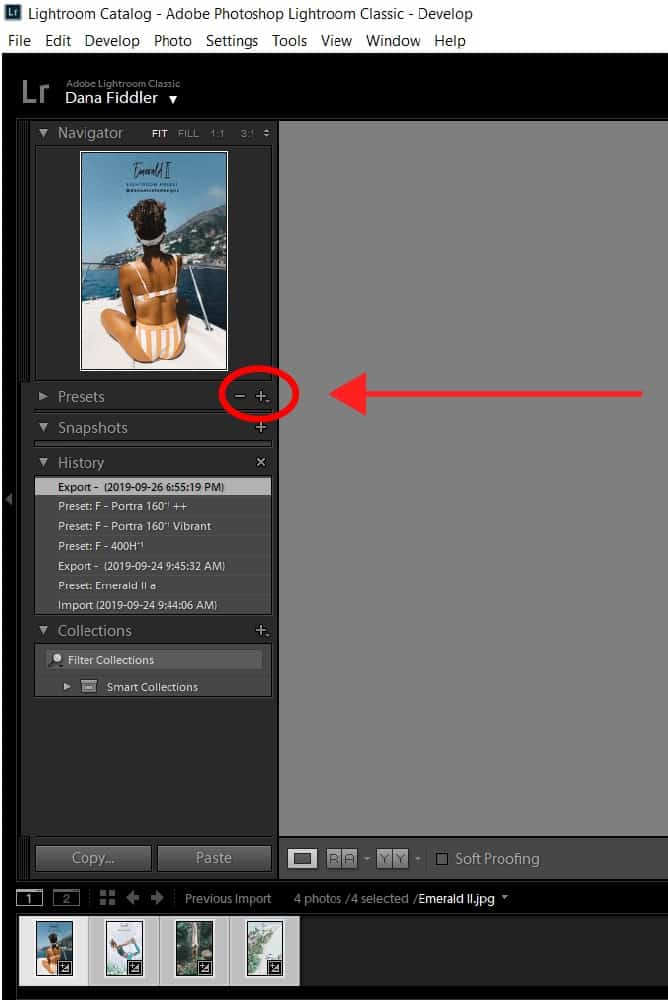
As we did above, we will leave all the boxes checked and name our preset!
You now have a preset that you can apply to as many photos as you want. However, you probably want to know how to export your preset. Exporting presets is simple and will allow you to share them via email with yourself and others.
With the photo selected in the “develop” module of Lightroom (the one that has the preset settings you’d like your preset to have), head into “File –> Export with Preset –> Export to DNG”.
Then select the folder that you wish the export your newly created preset.
And voilà! You now have a DNG preset file that you can share. You can also easily upload your preset to the Lightroom app on your phone.
How to Sell Lightroom Mobile Presets
Creating presets in Lightroom CC gives you the ability to share your presets, which also means you can sell them as digital products!
If your photo editing is highly sought after, selling your presets can be a great way to earn some extra money.
To sell Lightroom mobile presets, you will need to have an eCommerce store set up on your website (such as Woocommerce or Shopify).
You can also use online market places such as Etsy and Creative Market to sell your Lightroom mobile presets.
Now that you know how to make Lightroom mobile presets on mobile and Lightroom CC, you’ll be able to create your own that reflect your personality and your brand!
Pin me:
This article may include affiliate links. As an Amazon Associate I earn from qualifying purchases.

Dana Nicole is an award-winning freelance writer for MarTech/SaaS who was rated one of the best SaaS writers by Software World. She specializes in writing engaging content that ranks high in search engines and has been featured in publications like Semrush, ConvertKit, and Hotjar.
Dana holds a Bachelor’s degree in Business Administration and has over 15 years of experience working alongside national brands in their marketing departments.
When Dana’s not working, you can find her dancing en pointe, cooking up new recipes, and exploring the great outdoors with her two big dogs.