
Last Updated on
There’s a morbid saying in SEO that goes: the best place to hide a dead body is on the second page of Google.
It’s true that if you’re not on the first page, you’re not going to get many—if any—clicks to your content.
Optimizing your blog posts for search is one of the best ways to generate on-going traffic for years to come. Some of my most popular blog posts are posts I wrote years ago, that still bring in traffic today.
Although it can take time—nearly a year—for search engines to rank your articles and send you traffic, it’s good practice to optimize all your posts for search.
Let’s take a look at three areas you can improve upon right now!
1. Use the right keyword density
Search engines need keywords to understand what your content is about.
If you aren’t using enough keywords, your content might not rank high.
But how do you know how many times to use each keyword?
Here are two ways.
The first is to follow the 1%-2% keyword density rule of thumb.
Generally, using your keywords at that density is sufficient. For example, if you wrote a 1,000-word blog post, at a 2% keyword density your keyword—and slight variations of that keyword—should appear 20 times.
But there’s a better way.
Using a free tool, like this keyword density check, check the keyword density for the top 3 search results in Google for your keyword.
If the top three results use the keyword at a 5% density, it’s fair to say you need to use it around there as well. If they only use the keyword at a 0.5% density, then you can scale back, too.
Seeing what is already ranking on Google is the best way to figure out what keyword density you should use.
And a quick note: using the keyword more isn’t always better. Your content needs to read naturally otherwise it will come across as keyword stuffing.
Keywords don’t need to appear exlusively within your text, either. Here are different places to put keyword:
- Headings
- Image file names
- Alt text (only if applicable! Alt text is for screen readers and if the keyword doesn’t describe the photo, leave it out.)
- Post title
- Bullet/numbered lists
- The URL slug
2. Keep your content fresh and relevant
Going back into older posts and updating them by adding more relevant information and updated photos can give your rankings a boost.
The best content to update is your low hanging fruit…in other words, the blog posts that are almost on the first page but aren’t quite yet.
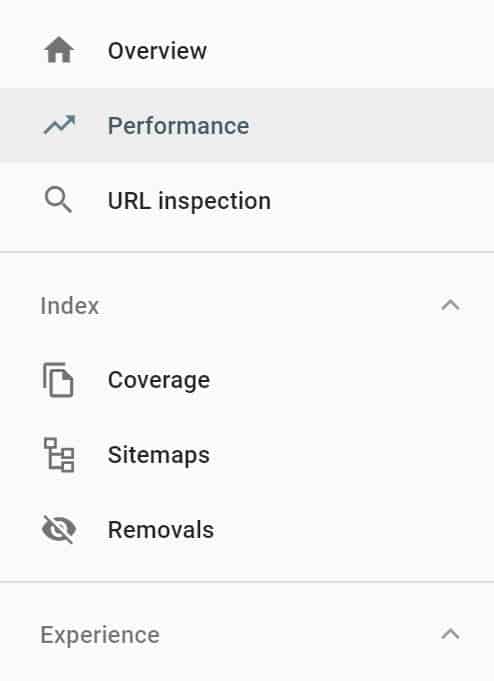
To find those, go into your Google Search Console and click Performance.
Next, turn on Average Position by clicking it.
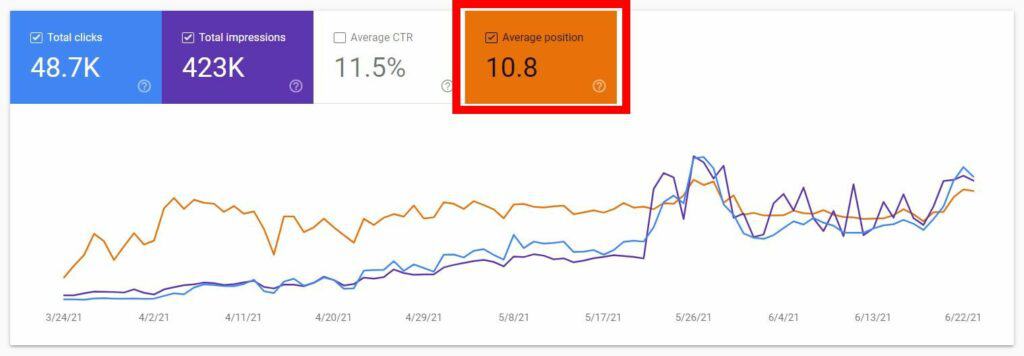
Below the chart, you will see all the different keywords you are ranking for. Sort the queries by position.
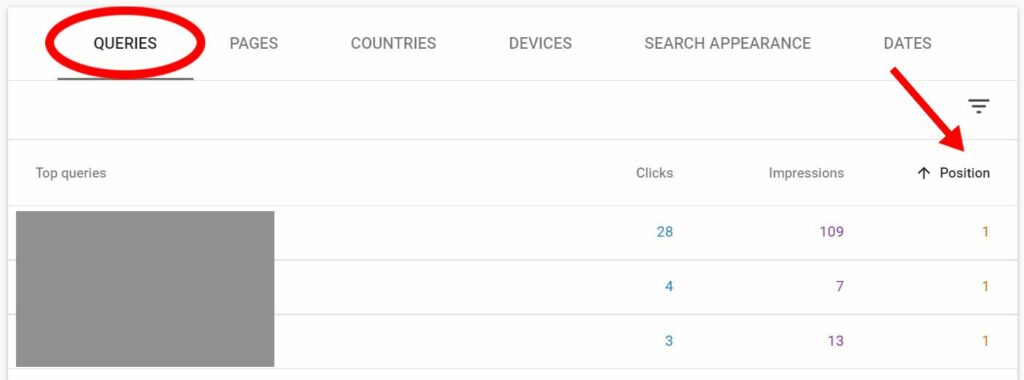
Lastly, find the keywords where you’re ranking off page 1 (usually those are positions 10-19 ish).
Go to the blog post related to the keyword and update it with more relevant information, better images, check the keyword density, optimize the images (which we’ll talk about next) to try and improve its rankings.
Pro tip: to improve user experience, use this plugin to show when you last updated a post. Readers want to read up-to-date and relevant blog posts and this is the easiest way to let them know you’re content is updated.
3. Optimize your images
Google has made it clear that website speed is a ranking factor.
A culprit of sluggish websites is bulky images.
Before uploading any images to your website, make sure you resize them and compress them.
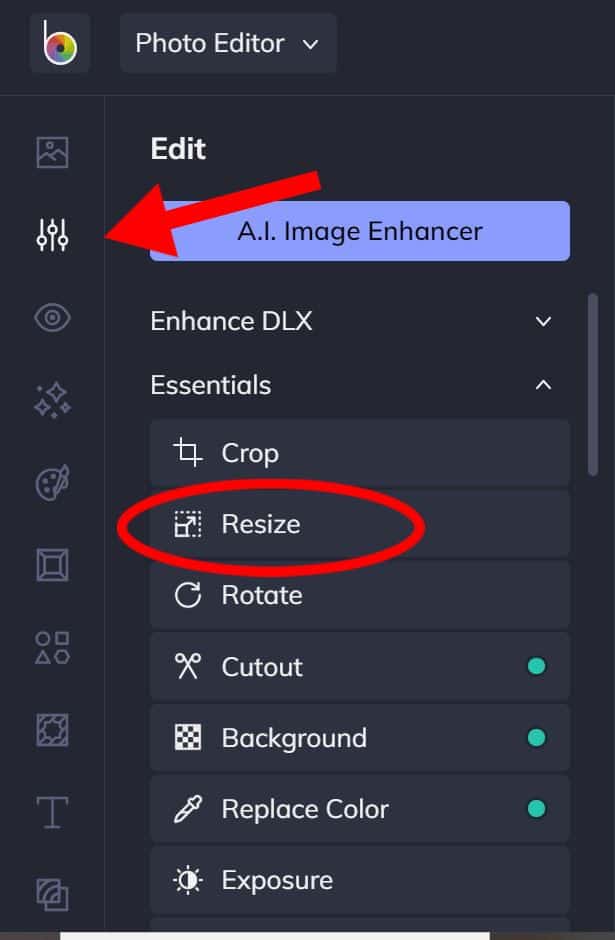
To resize images, I use BeFunky.
Head to Create > Photo Editor to resize your image.
Then drag and drop your image to upload.
Under the Edit tab, click on Resize.
After resizing your image (I usually go for a max height OR width of 1,000px) save it.
When saving your image, you can compress it by adjusting the slider.
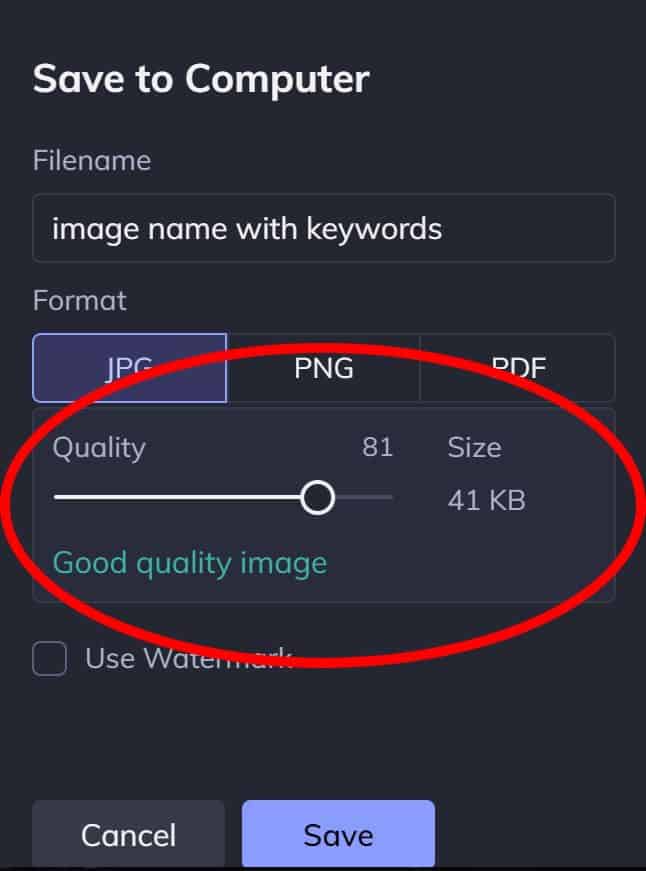
The slider will tell you what quality your image will be. Try to keep it within the “Good quality” range.
After that, I like to do one more round of compression by heading to TinyPNG where I drag and drop my image and it is automatically compressed a little more.
Doing this will optimize your images for your website so they don’t contribute to your load time.
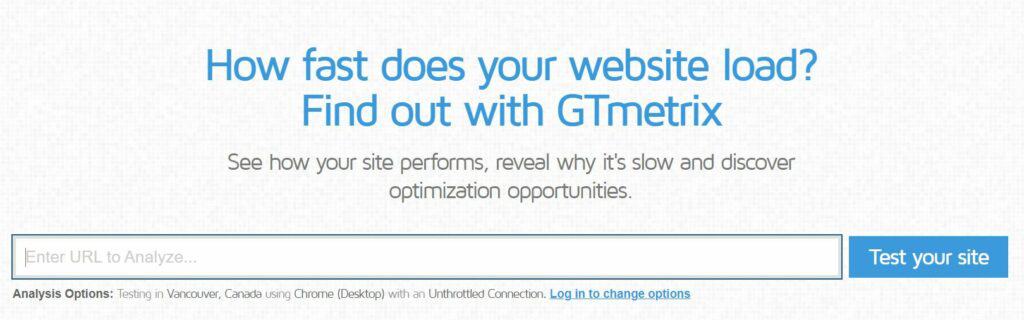
You can find which images already on your website need compression by using GTMetrix.
Add your URL and click Test your site.
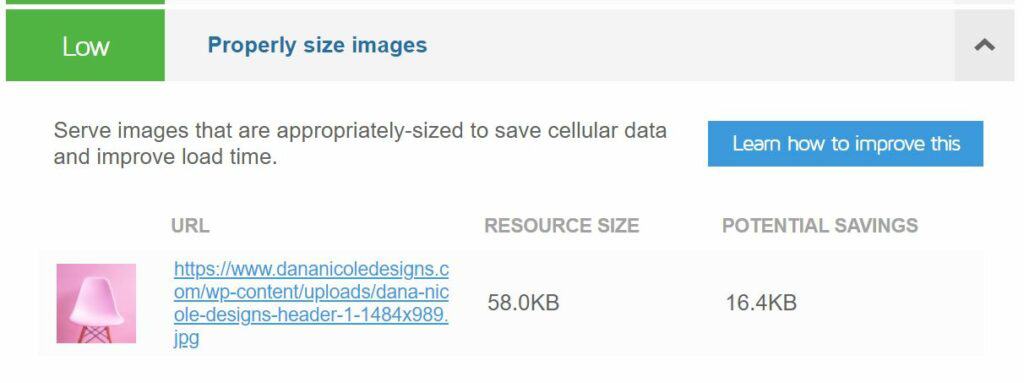
In your report, go into the Structure tab and scroll until you find something that says Properly size images. Click to open the box.
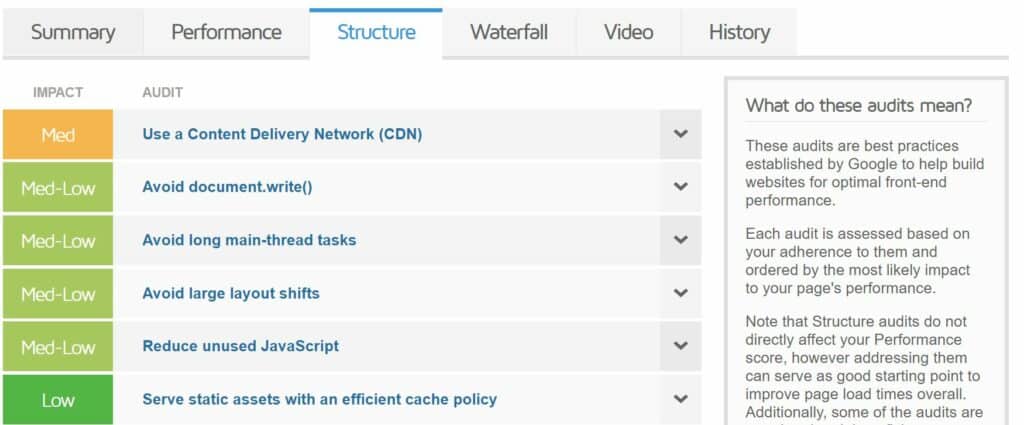
The box will list any images you need to resize.
And remember to save your images with keywords in the file name, using dashes (-) for spaces. For example: “dana-nicole-copywriter.jpg“.
Optimizing blog posts for search
These three simple ways can help you rank higher in Google and are fast to implement.
This article may include affiliate links. As an Amazon Associate I earn from qualifying purchases.

Dana Nicole is an award-winning freelance writer for MarTech/SaaS who was rated one of the best SaaS writers by Software World. She specializes in writing engaging content that ranks high in search engines and has been featured in publications like Semrush, ConvertKit, and Hotjar.
Dana holds a Bachelor’s degree in Business Administration and has over 15 years of experience working alongside national brands in their marketing departments.
When Dana’s not working, you can find her dancing en pointe, cooking up new recipes, and exploring the great outdoors with her two big dogs.